I haven't written anything in ages. Sorry if you were waiting for the next installment. Here it is at last.
I was saying earlier we
wanted to repair the house using traditional building methods. But we didn’t
know how to do this. We had lots to learn. For instance we knew we needed to use lime to
repair the structure of the house but we didn’t know what lime putty was or how it differed from hydraulic limes. Nor did we know which type of lime we needed to use on our
house. I read everything I could find about lime, in books and on the internet
and I was scared. I had visions of us having a large hole dug in the garden full
of steaming hot lime. It sounded dangerous. So when I found the Web site for
the Traditional Lime Company in Carlow I was relieved. Here was somewhere we
could go to get advice and it wasn't too far away.
The web site said The Traditional Lime Company organized courses and did site
visits. So one weekend, I printed off a photo of the house, knocked a big lump
of plaster off the wall and we headed off to Carlow. We didn’t make an
appointment. It didn’t even dawn on me that we would need to. When we got there
we discovered we should have. The Traditional Lime Company is a one man outfit.
If you need advise you need to meet Edward Byrne himself. When we got there we
met Frank. Frank runs the store. He told us we had just missed Ed. Lucky for us
he reached him by phone and Ed agreed to meet us at his home.
Edward Byrne
loves to talk about lime. I really enjoyed listening to him. To my relief he
said we could use hydraulic lime, 3.5. This could be mixed in an ordinary cement
mixer. He phoned Frank and asked him to show us how to do the mix. Also he told
us we could purchase a spray gun to apply the lime mortar to the outside walls.
Frank would show us how to do this also.
We headed home that
evening with a few bags of lime, sand and the gun in the car boot. We were
ready to have a go.
There is a knack to
applying lime plaster; firstly you have to wet the brick or stone wall,
spraying it till damp but not over wetting. This prevents the moisture in the
limecrete mix being drawn into the dry walls and prevents the plaster drying out too fast. It also also helps the plaster to bond with
the brick or stone. This type of plaster dries fast, so in order to slow down
the process and avoid shrinking and cracking you need to keep the plaster damp
by spraying with water at regular intervals. The speed at which it dries
depends on the weather, hot sun and drying winds will speed up drying and more
spraying will be needed than on dull days. Apart from this you can apply lime
plaster as you would cement plaster, using the same tools.
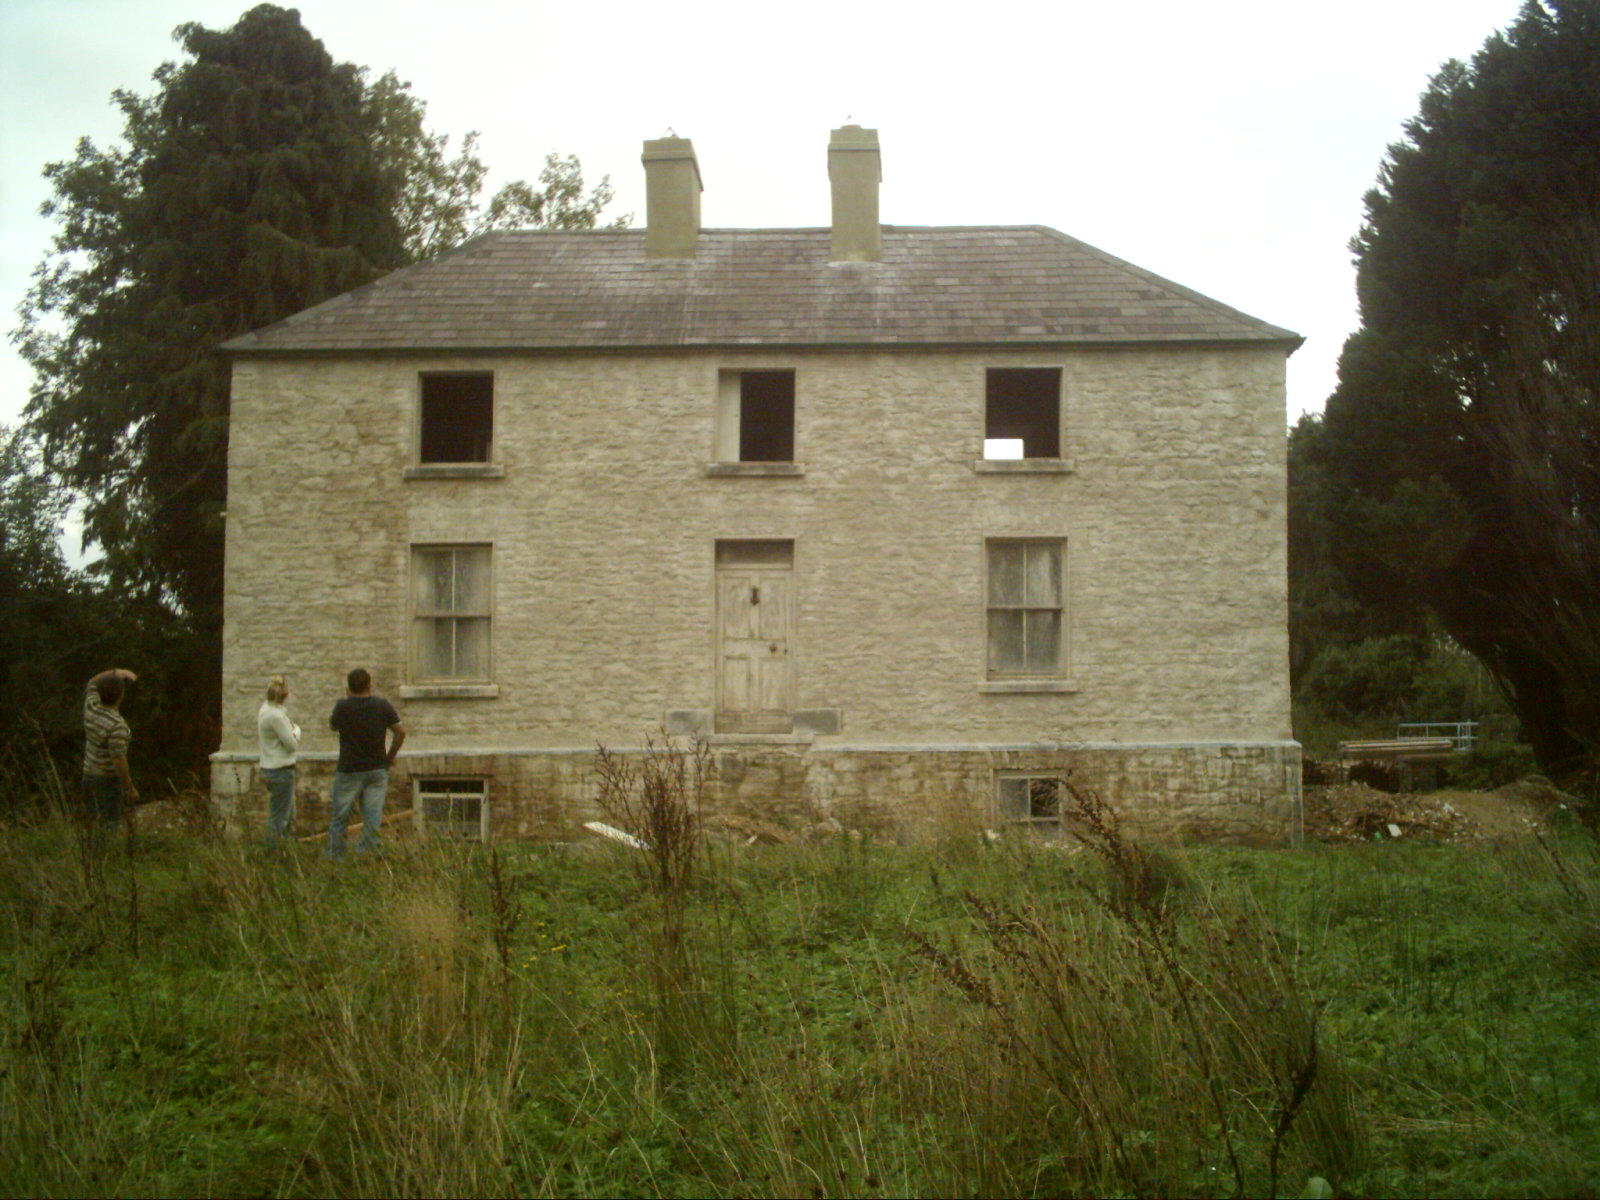
We stripped all the
outside plaster off the walls. The house looked
lovely with the stone exposed. I was tempted to leave it but in my heart I knew
we had to plaster it again. Our house was built with rubble stone and always had a plaster finish. The house had to be power-washed to remove any loose dust
and plaster. This should have been a straight forward job but there was a small
complication. We had no water supply. We hired a petrol power washer — at this stage we also had no electric supply. However water was
a bigger problem to solve. We brought full milk cans from home but these ran out
well before the job was finished.We had to get to know our new neighbors. We found everyone very helpful. They all had memories of times spent at the house and were all happy to see us doing it up.
They also helped us fill in the history of the house which I will write about later.
.jpg)
Anyway enough distraction, back to the lime plastering. The basement walls of
our house are thicker than the walls further up the house. As a result a ledge
runs around the outside of the house at basement ceiling height. In the past
this had been capped with slate which had not proved to be the best at keeping
out damp. We decided to run a strip of lead over the ledge, bringing it up the
wall so we could plaster over it and allowing it to run over the ledge to throw
water away from the lower wall. This photo shows the lead edge with the lime plaster above.

Once this was in place
our house was ready for plastering. We had heard mixed reviews about using the
spray gun. Professional plasterers would advise against it; but we couldn’t
afford to hire anyone. Pat is not too bad at plastering but we knew this was too big a job for him and also
would be much slower than using the gun.
Before we could start,
Pat plastered up the reveals around the windows and doors. If you know
what I am talking about great—if you don’t I suggest you
go and have a look at a house with finished dashing. You will notice the inside
area around the windows and doors has a flat plastered finish. This has to be
done with a trowel. The dashing on the outside walls comes up to the openings
to meet this flat plaster, giving you a lovely square finish around your
windows and doors. Pat put up temporary timber frames around the openings
giving him a flat surface to trowel the plaster up against. Once the timber was
in place he applied the lime plaster, from the window or door frame up to the
edge of the timber frame he had put in place. Once the plaster dried we were
able to take down the timber frames. We had lovely edges around all the
openings. This was slow work but we got there and at last we were ready to
start the walls.
The first morning was a
disaster. We had brought water with us again. We wouldn’t need as much as we
had for the power washing. We had also hired out a compressor. This had proved
difficult with the first hire shop letting us down even though we had it
booked. We needed the compressor to power the spray gun; however the fitting on
the spray gun did not fit the fitting on the compressor. We bought a fitting on
the way down that proved very difficult to get on to the hose, which runs
between the gun and the compressor. Then when we got it on and started the
compressor, both ends of the hose pipe blew within minutes, scaring the life
out of me.
Daniel and I headed of
to the local hardware shop to see if they could help. It was lunchtime and we
were frustrated because we hadn’t been able to start. In the local shop they
told us we would have to travel through Longford town, to a different store to
get the hose and fittings sorted. Now I do not like driving and I am worse when
I have to drive somewhere new. Longford is a busy town. I was sure I’d be sandwiched
between two monster trucks. I was a nervous wreck by the time I got to the
store but they did a good job on the hose. It was three in the afternoon before
we got back and were able to start.
We had bought a new
cement mixer. This was my territory. I was given the responsibility of doing
the mix, one part lime to two and a half parts sand. You need clean, sharp sand
for mixing with the lime. We opted for granite sand. The water had to be added
slowly and each mix took twenty minutes so the lime would have time to fatten. It
was a bit like making pastry and I am good at that. Pat was up the scaffolding
with the spray gun. Daniel was with him pulling up the buckets of plaster.
Brendan was at the bottom collecting the plaster from me and filling the
buckets. The assembly line worked well except Brendan always seemed to arrive
for another load of plaster before it was ready. I had a job making him wait. If
he thought it was too wet or too dry he would slag me off. We worked late that
first evening after our slow start. It took two days in all to get the first
scratch coat on. I should mention here that we were only doing the top two
floors, down to the led cover ledge. We would need to dig out around the house
before we would be able to do the basement walls as the clay was up against
them. We had to let the plaster dry out before we could apply the second coat.
It should be left for at least two days. And we had to do the same before the
third coat was applied. After three coats it looked really good.
Now this finish might
not be to everyone’s taste. When you use the gun to apply the plaster, the
plaster follows the contours of the stone. So it is obvious that the walls are
built of stone rubble. If you prefer a flatter finish I think you will need to
do it by hand. Also we did not finish the final coat with a pebble mix. This
again would need to be applied by hand to get it right. We are lucky our house
is not listed. If it was a listed house we might not have been allowed to apply
the plaster in this way. However we liked the finish and were happy that we had
applied a plaster that would protect the house while letting it breath.
No comments:
Post a Comment